

AWS Private Deployment Guide (EC2 and EKS)
Introduction
Section titled “Introduction”This guide walks you through the process of setting up a production-ready environment for deploying Cohere models in AWS.
Private deployment in AWS offers enhanced security, compliance, and control over your infrastructure and applications while leveraging AWS’s reliable and scalable cloud services.
What this guide will cover
Section titled “What this guide will cover”This guide provides comprehensive instructions for deploying applications in a private AWS environment using EC2 instances and Amazon EKS (Elastic Kubernetes Service).
Note: This guide uses an example of deploying the Embed Multilingual 3 model. If you are deploying a different model, the instance sizing will differ – please contact sales for further information.
Prerequisites
Section titled “Prerequisites”Before beginning this deployment, you should have:
- An AWS account with appropriate permissions
- Basic familiarity with AWS services and the AWS console
- Understanding of Linux command line operations
- Knowledge of containerization concepts if deploying containerized applications
- The licence ID and model tag for the model you want to deploy. Please reach out to the Cohere team to get these.
Follow this guide sequentially to ensure all components are properly configured for a secure and efficient private deployment in AWS.
Deploying via EC2 instances
Section titled “Deploying via EC2 instances”Amazon Elastic Compute Cloud (EC2) provides scalable computing capacity in the AWS cloud and forms the foundation of your private deployment.
In this section, we’ll walk through launching an appropriate GPU-enabled EC2 instance, connecting to it securely, and installing the necessary NVIDIA drivers to utilize the GPU hardware.
The following sections provide a step by step guide to deploy the Embed Multilingual 3 model on EC2.
Launch EC2 instance
Section titled “Launch EC2 instance”First, launch an EC2 instance with the following specifications:
- Application and OS images - Ubuntu
- Instance Type - g5.2xlarge - 8vCPU
- Storage - 512 GB - root volume
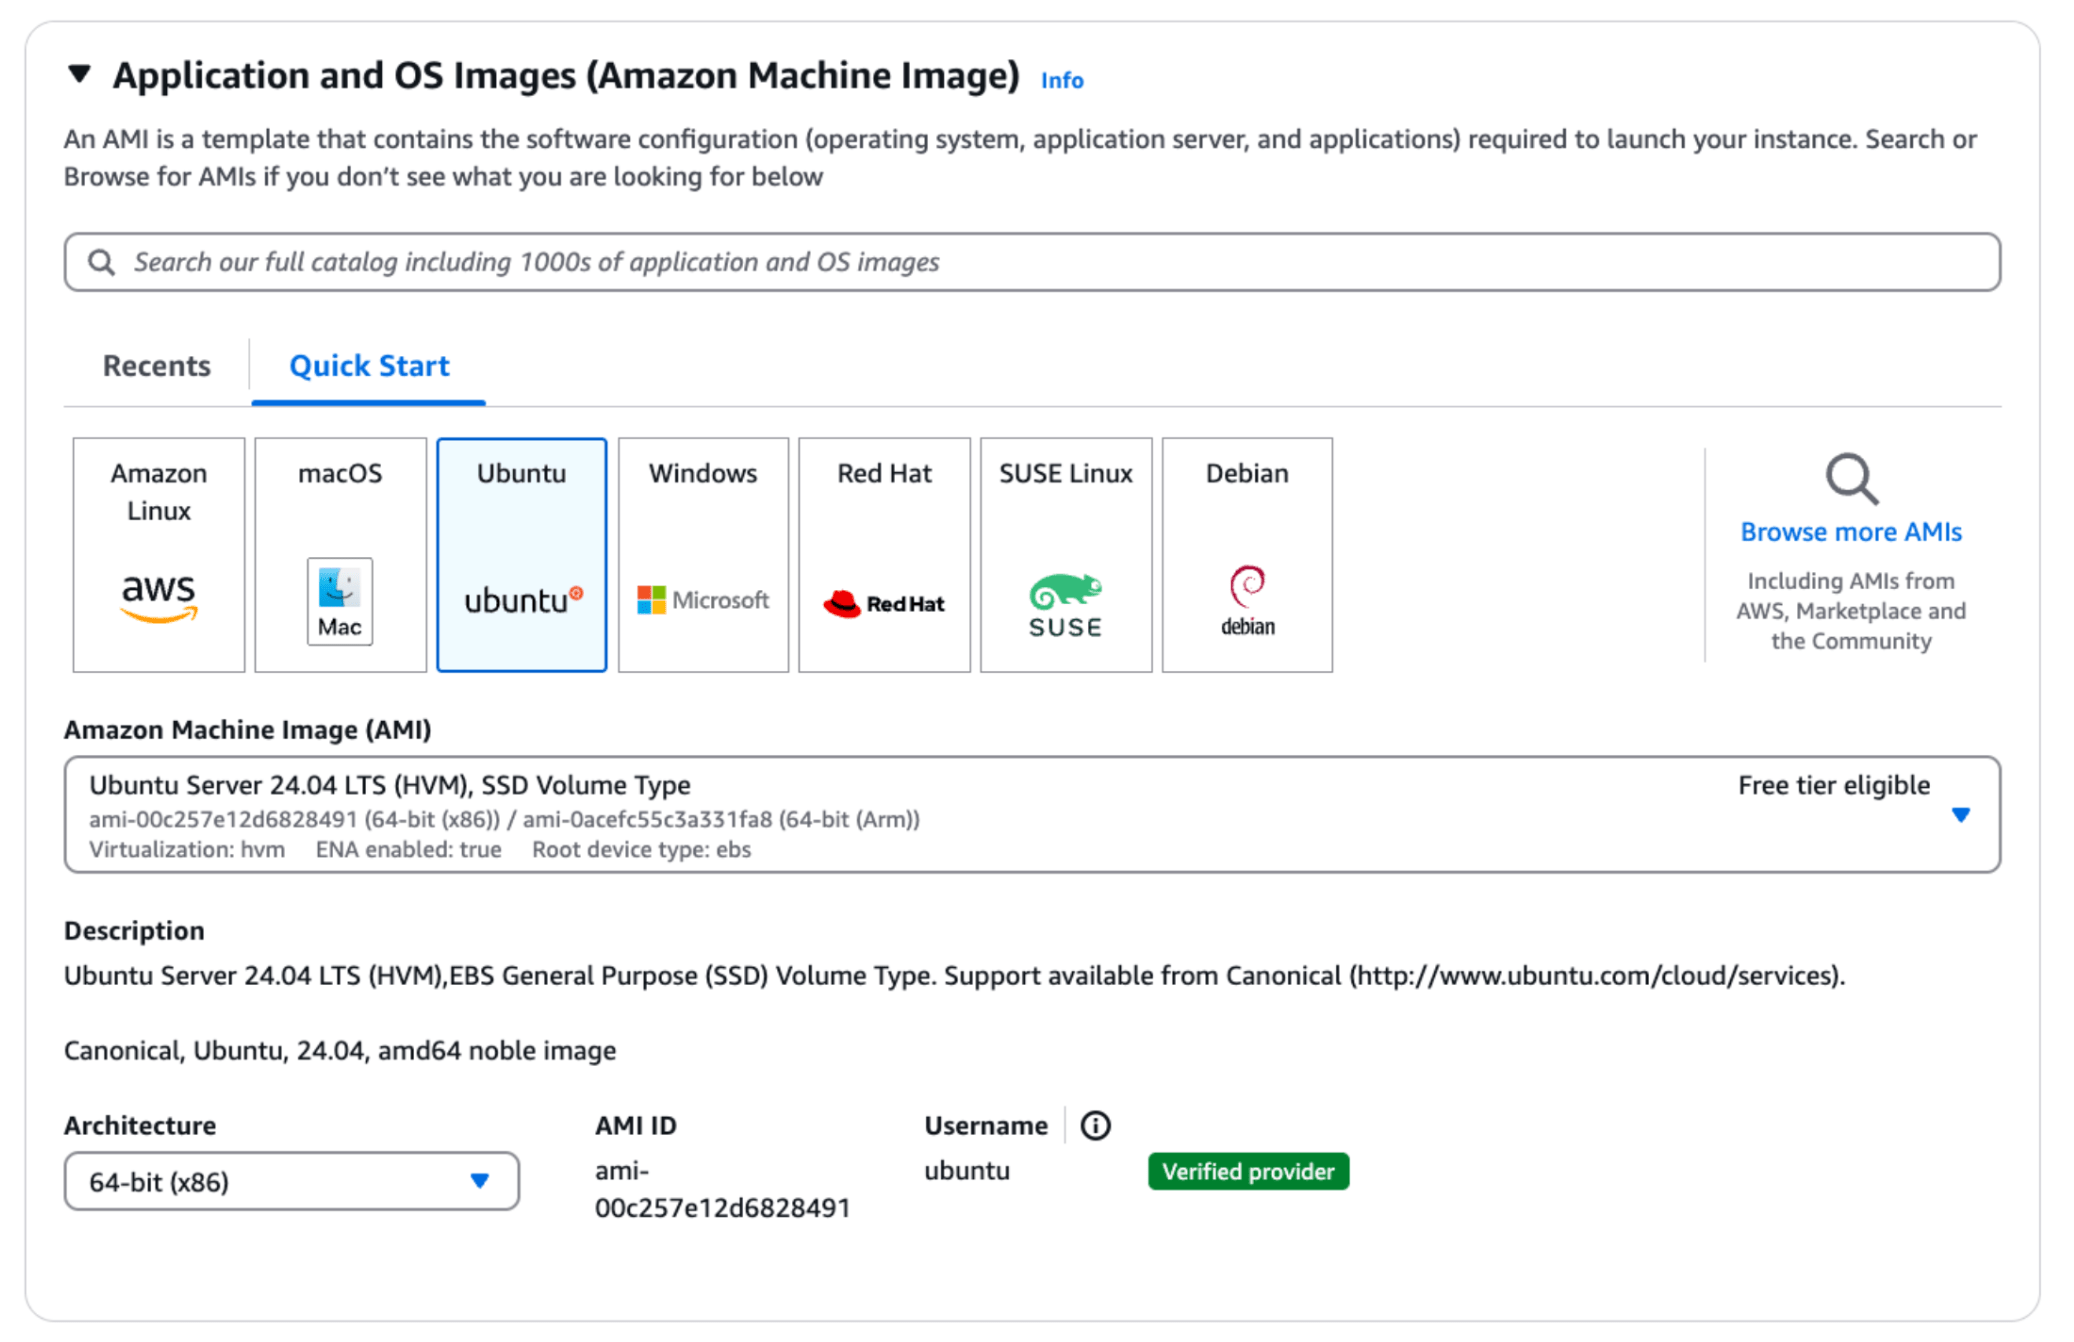
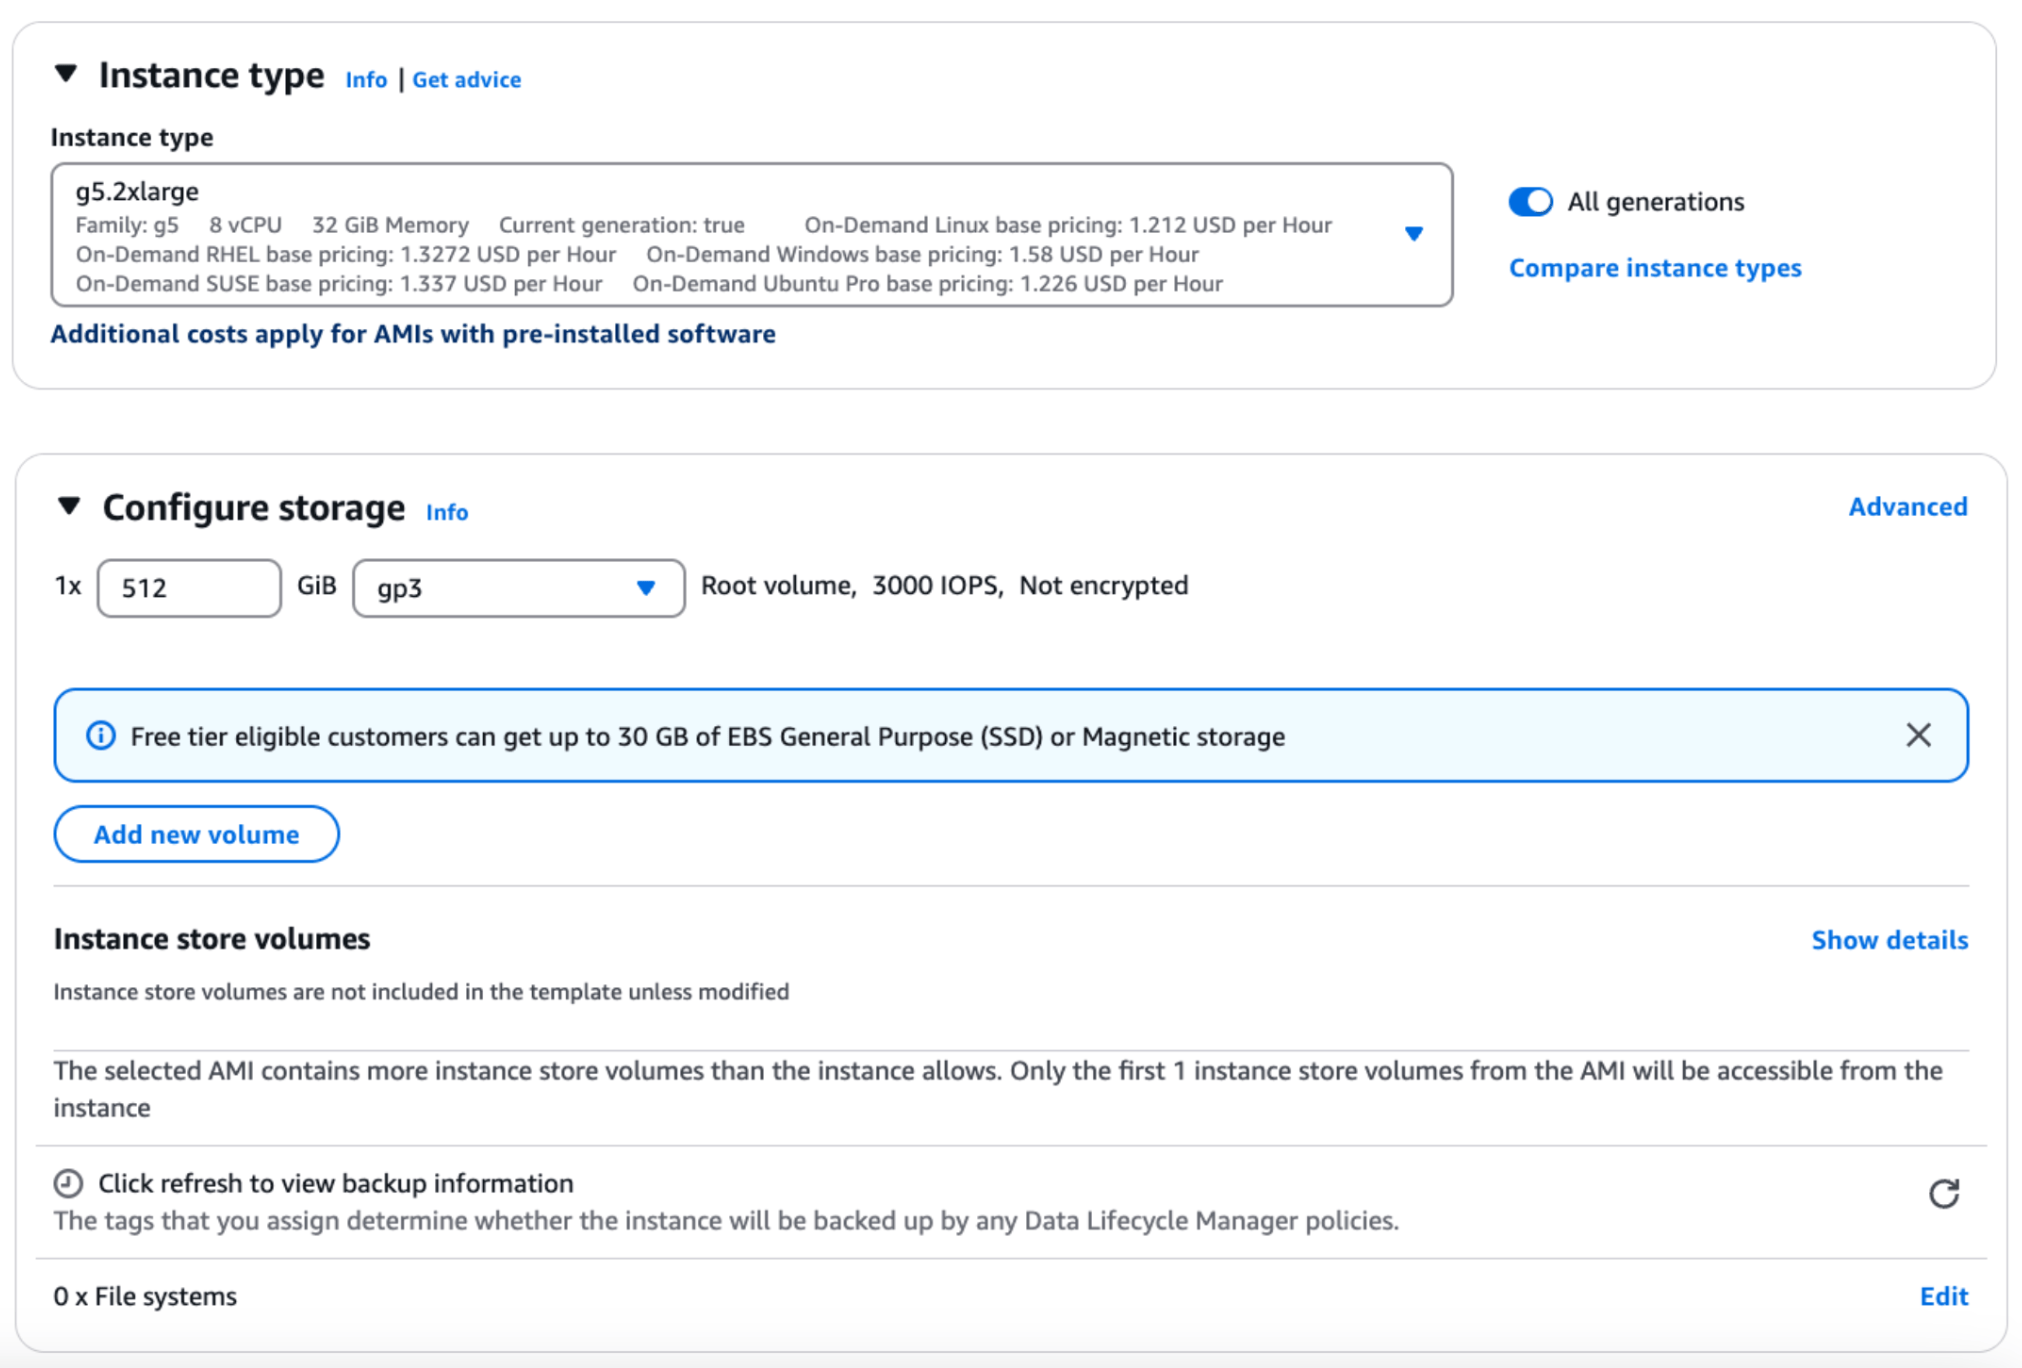
SSH to the EC2 instance using AWS console - ‘EC2 Instance Connect’ option
Section titled “SSH to the EC2 instance using AWS console - ‘EC2 Instance Connect’ option”Next, connect to your EC2 instance using the “EC2 Instance Connect” option. This allows you to access the instance through a browser-based client using the default username “ubuntu.” Ensure your instance has a public IPv4 address for successful connection.
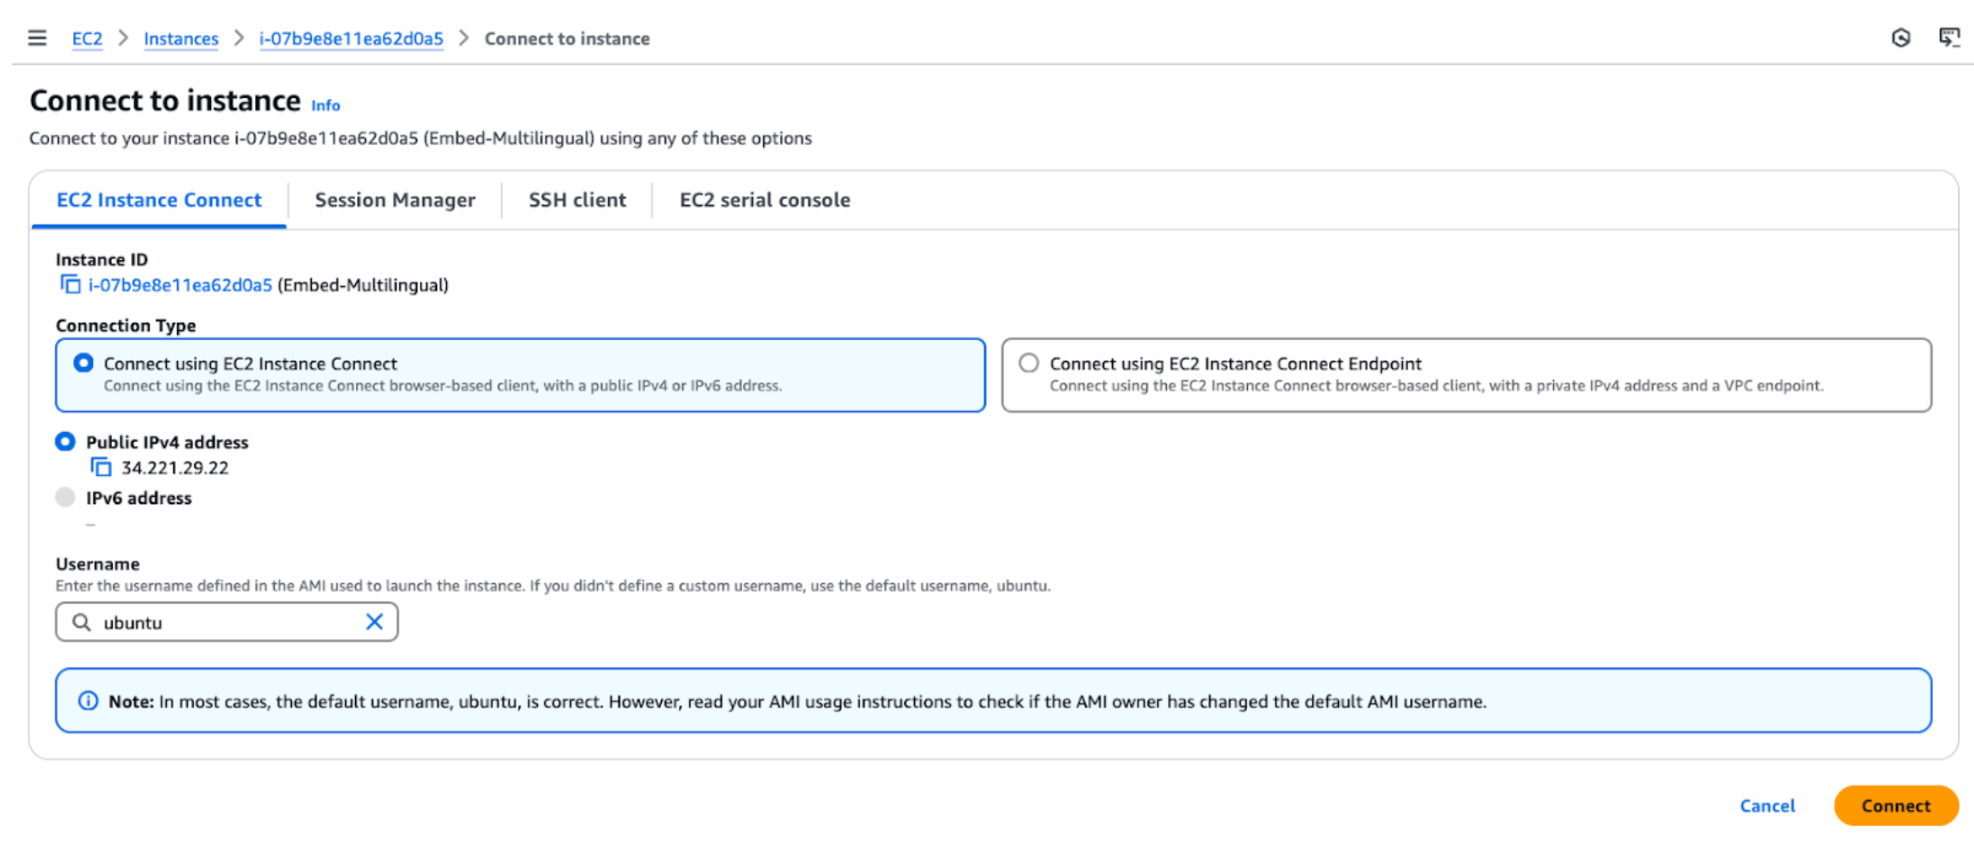
Install Nvidia drivers
Section titled “Install Nvidia drivers”Next, install the NVIDIA drivers on your EC2 instance to enable GPU support. Use the following commands to install the necessary drivers and the NVIDIA CUDA toolkit.
-
Nvidia drivers
Bash sudo apt install -y ubuntu-drivers-common sudo ubuntu-drivers install sudo apt install nvidia-cuda-toolkit -
Nvidia container toolkit
Bash curl -fsSL https://nvidia.github.io/libnvidia-container/gpgkey | sudo gpg --dearmor -o /usr/share/keyrings/nvidia-container-toolkit-keyring.gpg && curl -s -L https://nvidia.github.io/libnvidia-container/stable/deb/nvidia-container-toolkit.list | sed 's#deb https://#deb [signed-by=/usr/share/keyrings/nvidia-container-toolkit-keyring.gpg] https://#g' | sudo tee /etc/apt/sources.list.d/nvidia-container-toolkit.list sed -i -e '/experimental/ s/^#//g' /etc/apt/sources.list.d/nvidia-container-toolkit.list sudo apt-get update sudo apt-get install -y nvidia-container-toolkit -
Reboot the system This is often necessary after installing drivers or making significant system changes to ensure all components are properly initialized and running with the latest configurations.
Before rebooting, restart any mentioned services after running the above commands.
Bash sudo reboot -
Verify that the GPU is correctly installed
Bash nvidia-smi
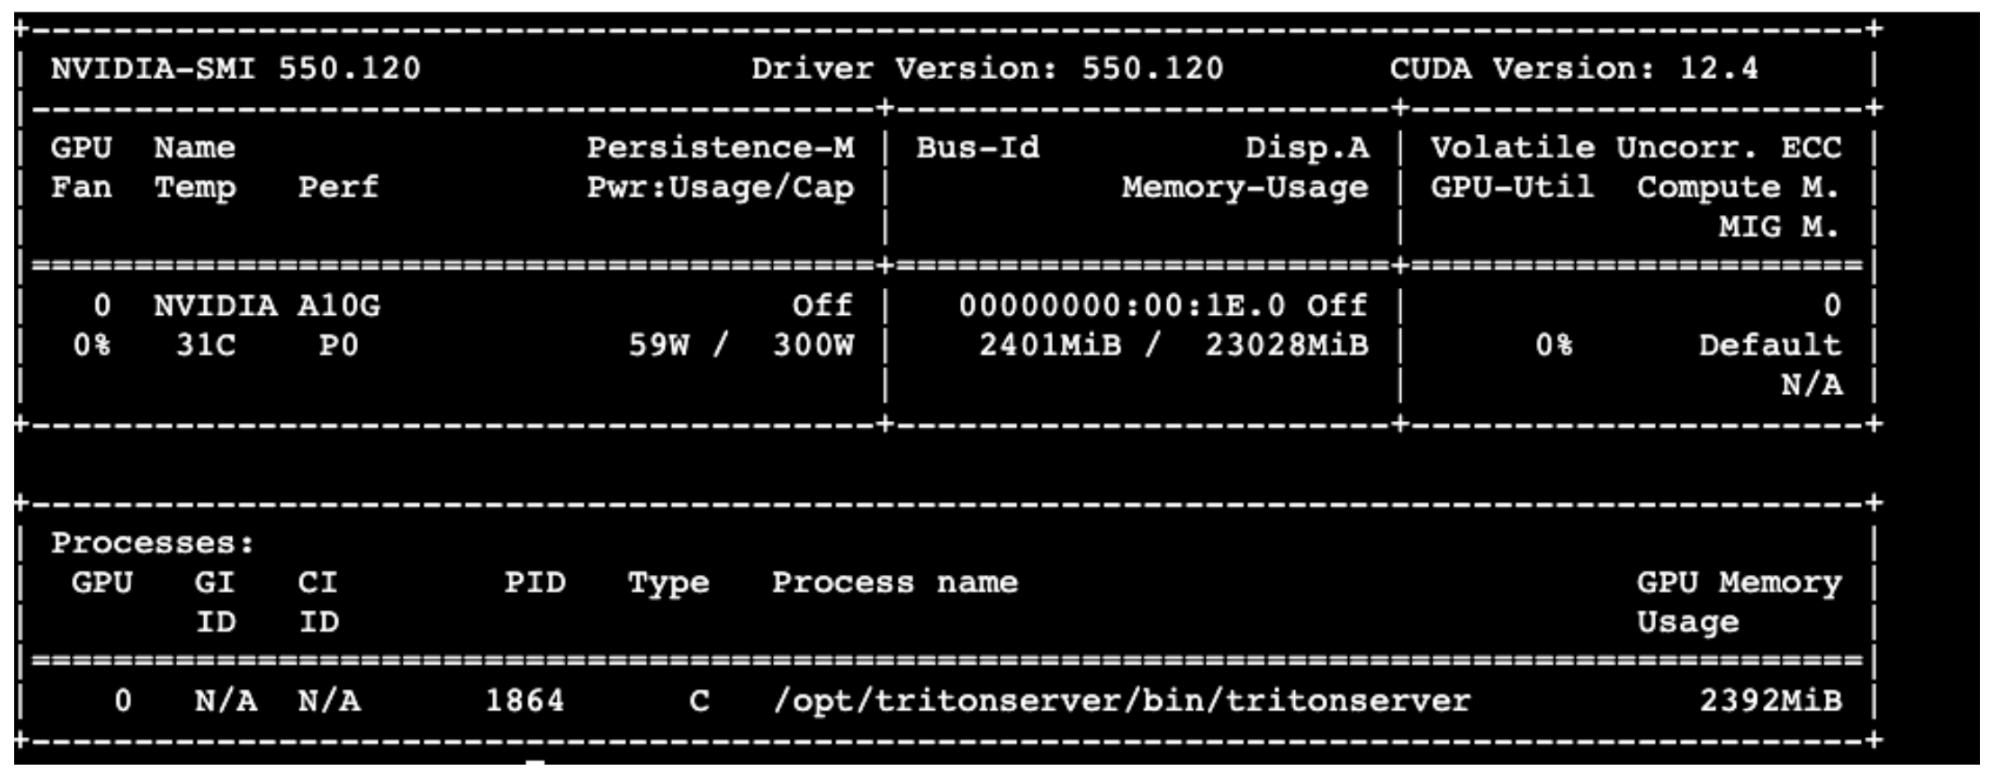
Install docker on the instance
Section titled “Install docker on the instance”Next, install Docker on your instance. This involves updating the package list, installing Docker, starting the Docker service, and verifying the installation by running a test container.
sudo apt-get update
sudo apt-get install docker.io -ysudo systemctl start docker
sudo docker run hello-world
sudo systemctl enable docker
docker --versionDefine environment variables
Section titled “Define environment variables”export CUSTOMER_TAG=proxy.replicated.com/proxy/cohere/us-docker.pkg.dev/cohere-artifacts/replicated/single-serving-embed-multilingual-03:<YOUR_MODEL_TAG>
export LICENSE_ID="<YOUR_LICENSE_ID>"
export DOCKER_CONFIG=$(mktemp -d)
cat <<EOF > "${DOCKER_CONFIG}/config.json" { "auths": { "proxy.replicated.com": {"auth": "$(echo -n "${LICENSE_ID}:${LICENSE_ID}" | base64 | tr -d '\n')"}}EOFPull container image
Section titled “Pull container image”Next, prepare the environment by obtaining the required software components for deployment.
sudo docker pull $CUSTOMER_TAGIf you encounter an error “permission denied while trying to connect to the Docker daemon socket at”, run the following command:
sudo chmod 666 /var/run/docker.sockThen, verify that the image has been pulled successfully:
sudo docker images
Start container
Section titled “Start container”Next, run the Docker container. This starts the container in detached mode with GPU support.
sudo docker run -d --rm --name embed-english --gpus=1 --net=host proxy.replicated.com/proxy/cohere/us-docker.pkg.dev/cohere-artifacts/replicated/single-serving-embed-multilingual-03:<YOUR_MODEL_TAG>
sudo docker ps
Call the model
Section titled “Call the model”Next, test calling the model by executing the curl command to send a POST request to the local server. This tests the model’s functionality by providing input data for processing.
curl --header "Content-Type: application/json" --request POST http://localhost:8080/embed --data-raw '{"texts": ["testing multilingual embeddings"], "input_type": "classification"}'Deploying via EKS (Elastic Kubernetes Service)
Section titled “Deploying via EKS (Elastic Kubernetes Service)”Amazon Elastic Kubernetes Service (EKS) provides a managed Kubernetes environment, allowing you to run containerized applications at scale. It leverages Kubernetes’ orchestration capabilities for efficient resource management and scalability.
In this section, we’ll walk through setting up an EKS cluster, configuring it for GPU support, and deploying your application.
Launch EKS cluster
Section titled “Launch EKS cluster”First, launch an EKS cluster by following the steps in the AWS documentation, and in particular, the steps in Prerequisites and Step 1-4.
The steps in summary:
- Install AWS CLI and Kubectl
- Create the Amazon EKS cluster
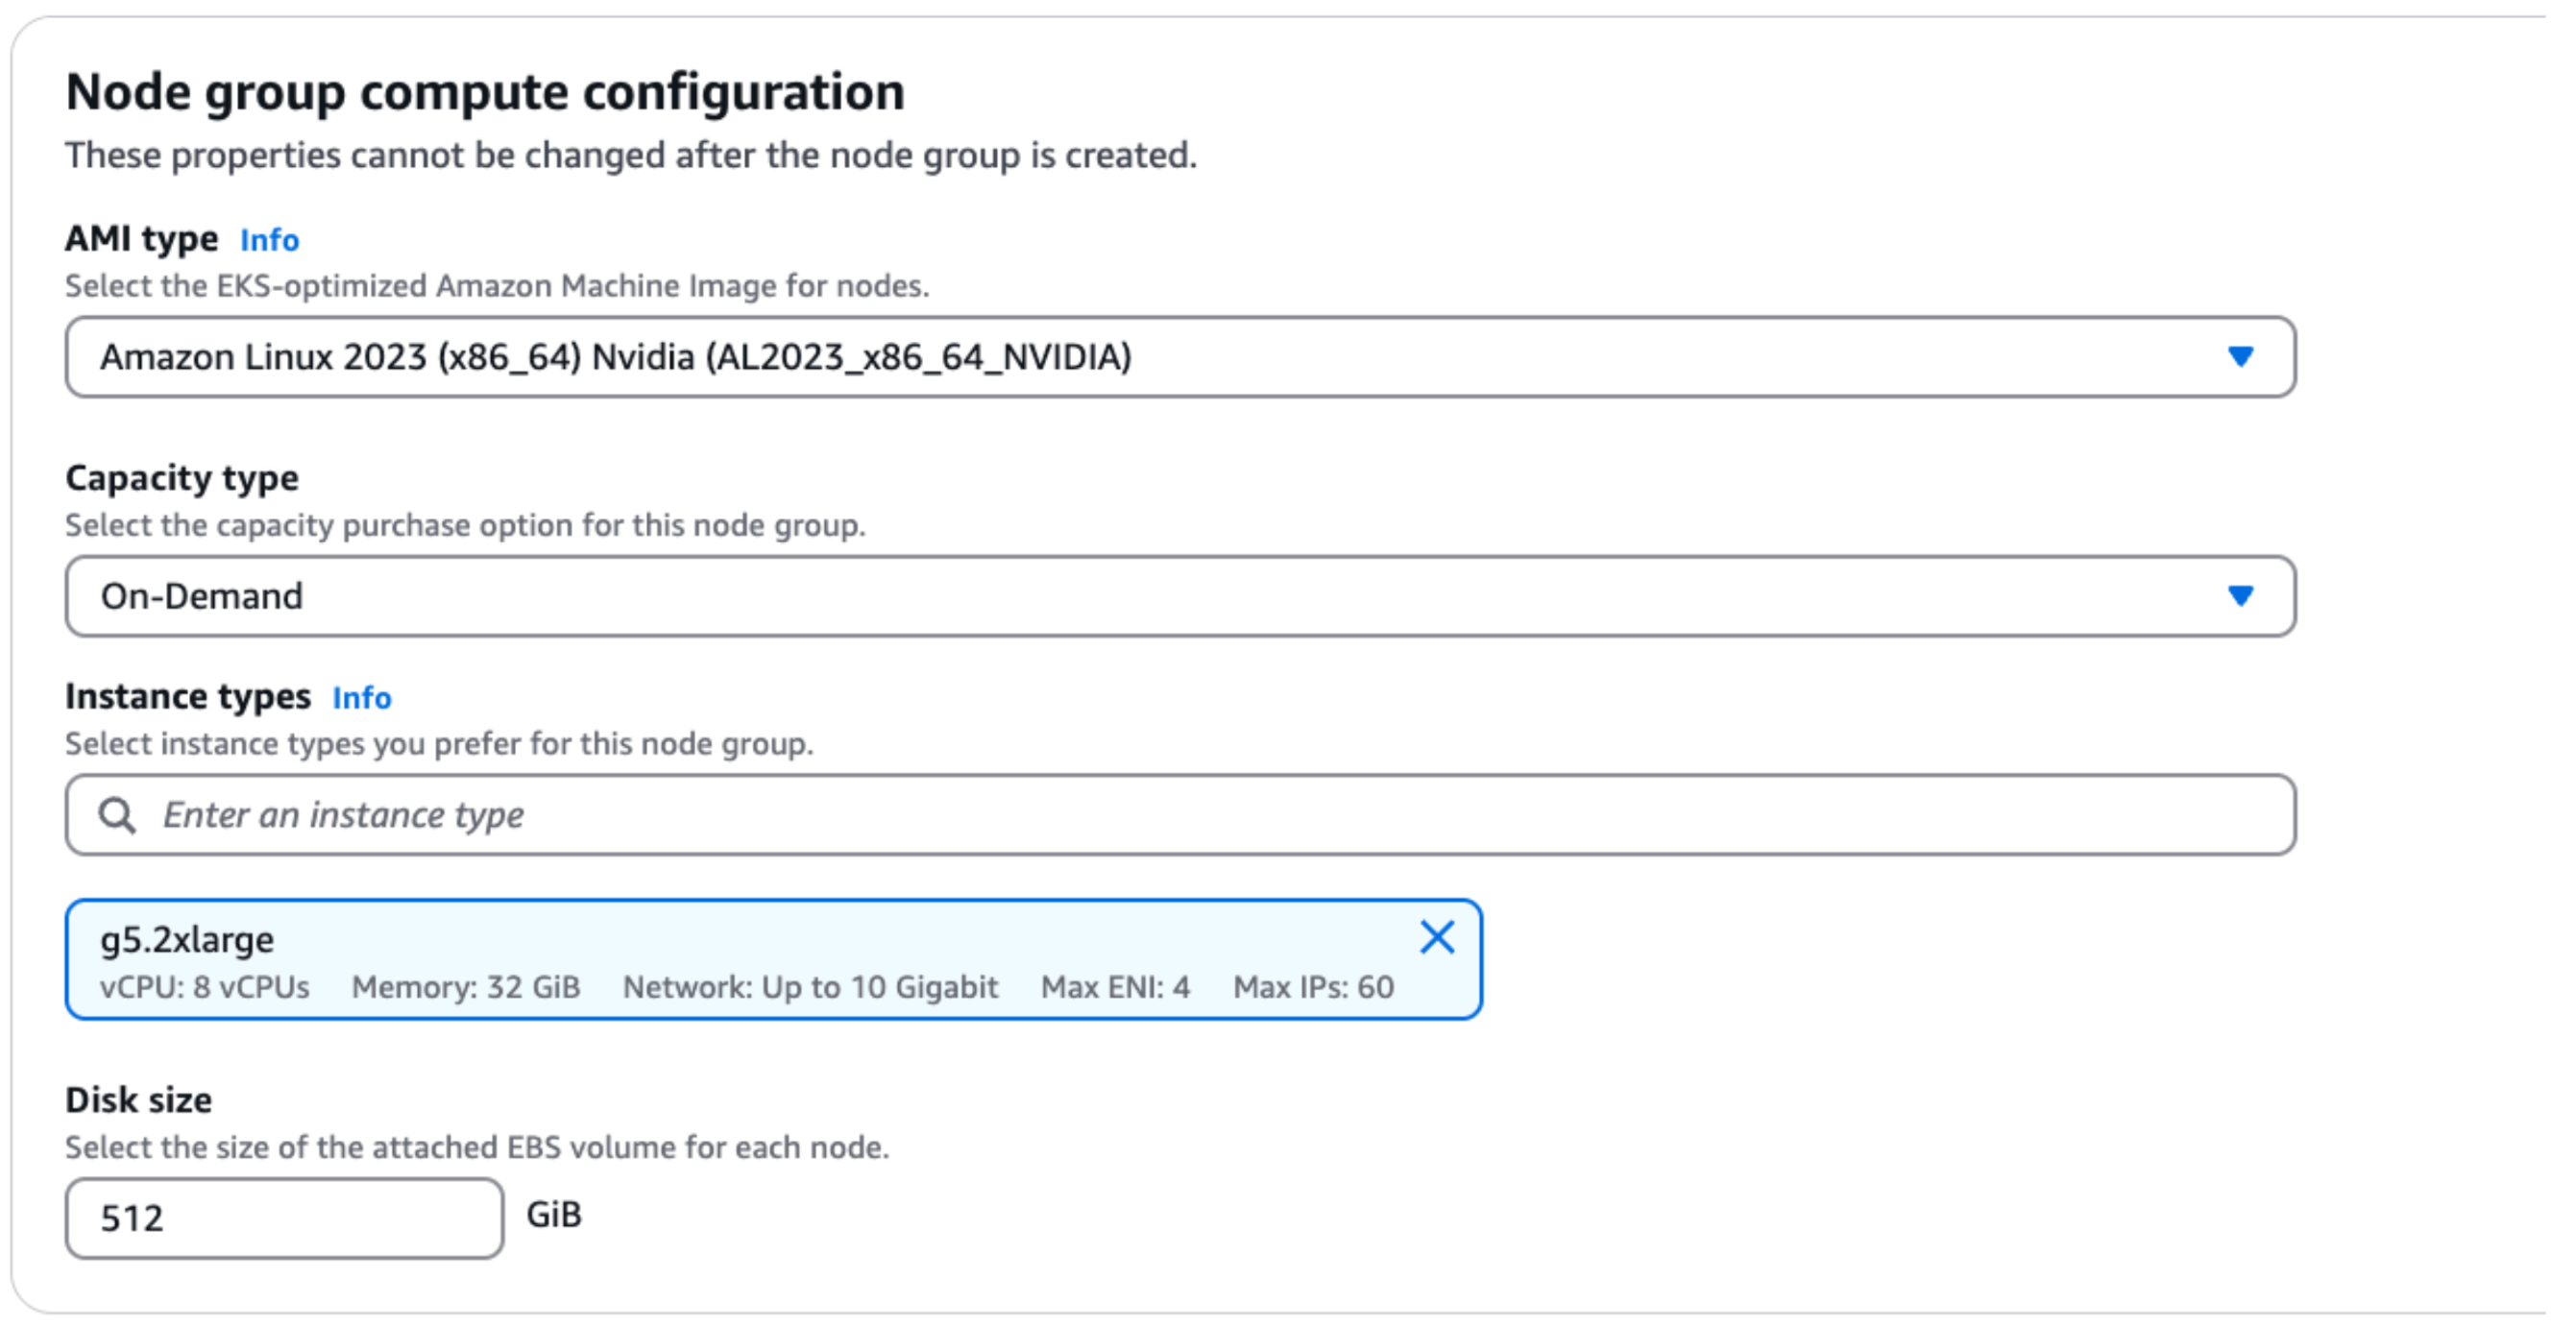
- As part of adding nodes to the cluster in step3, use the following
- AMI type - Amazon Linux 2023 - Nvidia (nvidia drivers pre-installed)
- Instance Type - g5.2xlarge - 8vCPU
- Storage - 512 GB
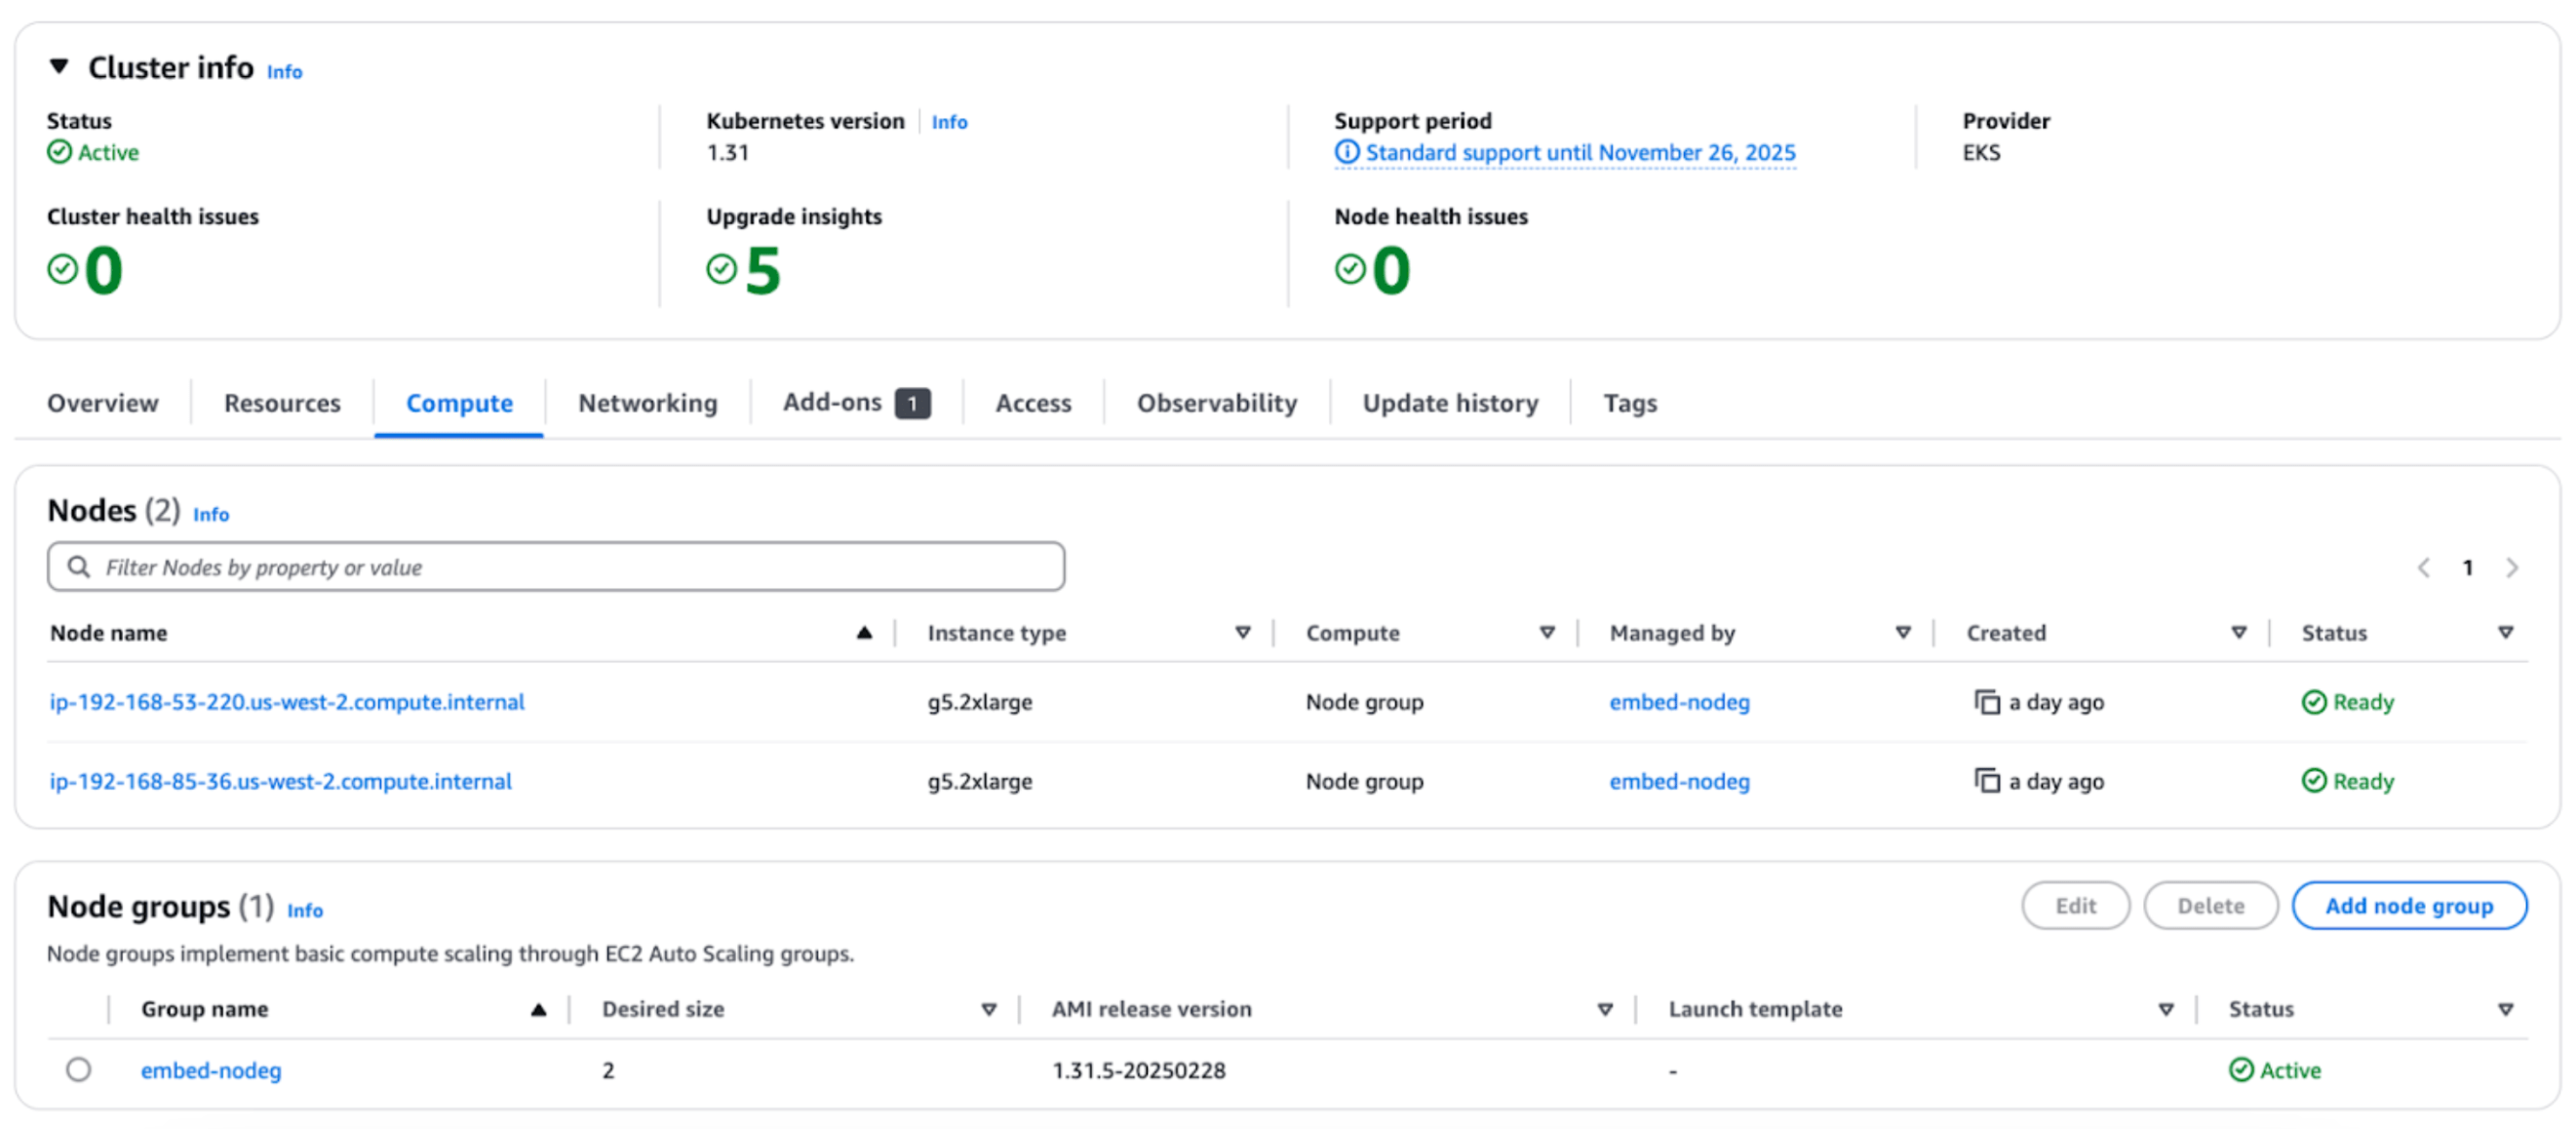
You can then view the cluster information in the AWS console.
Define environment variables
Section titled “Define environment variables”Next, set environment variables from the machine where the AWS CLI and Kubectl are installed.
export CUSTOMER_TAG=proxy.replicated.com/proxy/cohere/us-docker.pkg.dev/cohere-artifacts/replicated/single-serving-embed-multilingual-03:<YOUR_MODEL_TAG>
export LICENSE_ID="<YOUR_LICENSE_ID>"
export DOCKER_CONFIG=$(mktemp -d)
cat <<EOF > "${DOCKER_CONFIG}/config.json" { "auths": { "proxy.replicated.com": {"auth": "$(echo -n "${LICENSE_ID}:${LICENSE_ID}" | base64 | tr -d '\n')"}}EOF
kubectl create secret generic cohere-pull-secret --from-file=.dockerconfigjson="{$DOCKER_CONFIG}/config.json" --type=kubernetes.io/dockerconfigjsonGenerate application manifest
Section titled “Generate application manifest”Next, generate an application manifest by creating a file named cohere.yaml. The file contents should be copied from this link.
Start deployment
Section titled “Start deployment”Next, start the deployment by applying the configuration file. Then, check the status and monitor the logs of your pods.
kubectl apply -f cohere.yaml
kubectl get pods
kubectl logs -f <pod-name-from-above-command>
Call the model
Section titled “Call the model”Next, run the model by first setting up port forwarding.
kubectl port-forward svc/cohere 8080:8080Then, open a second window and send a test request using the curl command.
curl --header "Content-Type: application/json" --request POST http://localhost:8080/embed --data-raw '{"texts": ["testing embeddings in english"], "input_type": "classification"}'